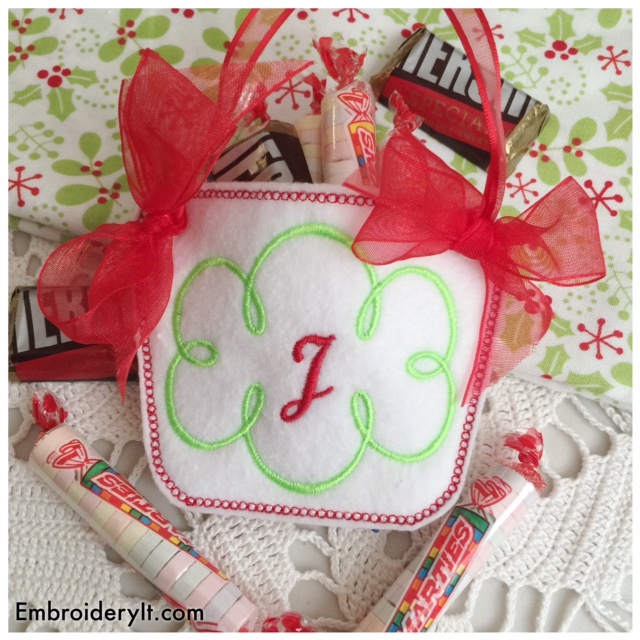
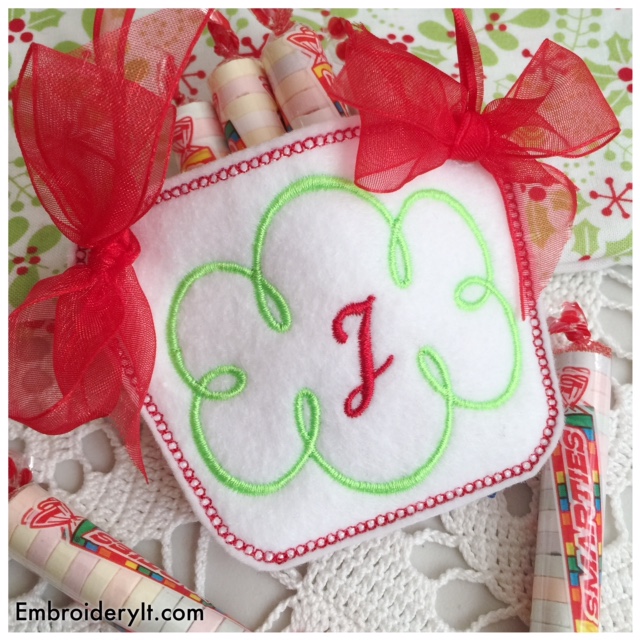
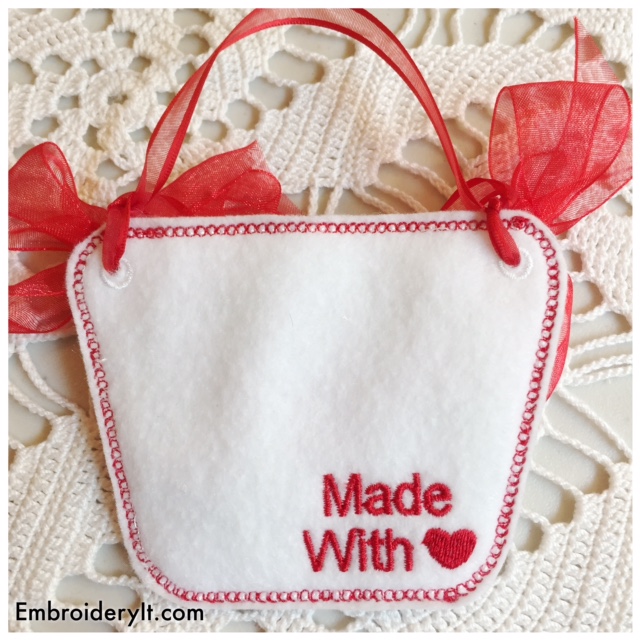
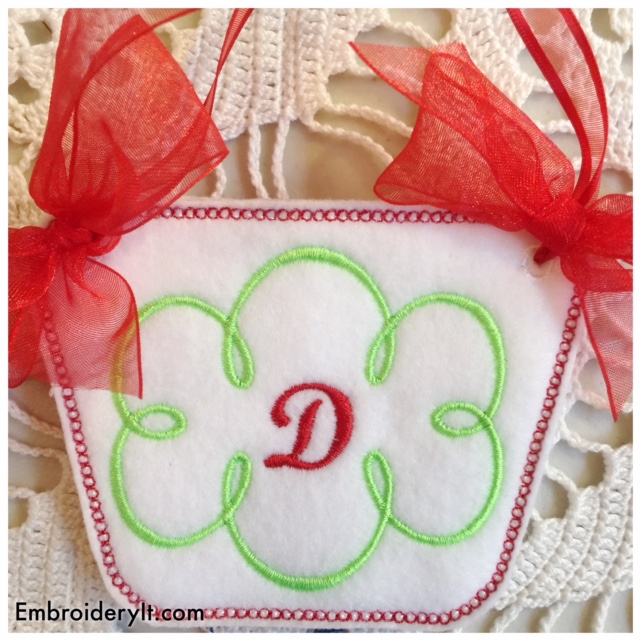
Here is a fun use for the Valentine Mason Jar Lid Alphabet set. The design fits perfectly inside those plastic ornaments which open in half. I got mine at Hobby Lobby and they sell them year round. Guessing they are at the other craft stores as well.
Stitch the design on a lightweight cotton fabric using a light weight stabilizer. I used tear-away. Once the design is stitched out and stabilizer removed, open the ornament and center the design. Then just close the ornament with the other half of it and trim excess fabric away.
Place a small bead of glue around the two halves and add a bit of lace or ribbon. This will hide where the halves meet plus keep it from accidentally popping open.
Add a hanger and bow. Consider adding a sprinkle of glitter or flocking inside the ornament before closing it up. Super cute for gift giving.
Believe me when I tell you the photos don’t do this justice. It turned out adorable.
Have fun with this little project!
Here is another use for the design. Perfect monogram on an infant or child’s shirt. Just add a bow for flair!
Friends, this was the January alphabet set for the Embroidery Bee members. Don’t miss out. Find out more about the monthly club by clicking HERE.
The design is now available for all in the Embroidery It Etsy store and Zibbet shop.
In my neck of the woods, the ground is covered in snow and everything is just white, gray and brown. With the Christmas decorations all put away now it all feels so plain. Getting into the studio is like a breath of fresh air as it is full of color and stitching for Valentine’s day is simply cheerful.
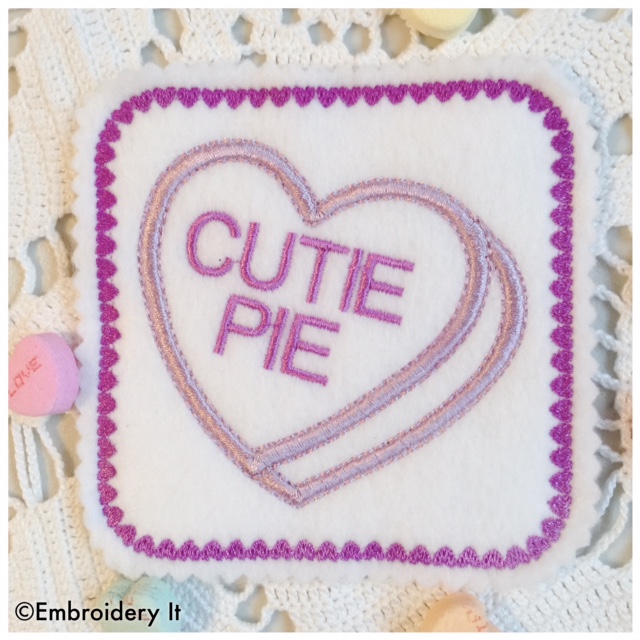
Here is the Candy Hearts Coasters which double as a wall decor project. They are made in the 4 x 4 hoop. To turn them into a decor project, just glue them onto ribbon and add a bow. Instructions on this along with lots of photos are included. 4 designs are in the set.
Make them in all different colors so when using as a coaster, each person can easily identify their glass.
I’m just beyond excited to tell you about Embroidery Its new membership program called the Embroidery Bee.
Each month, members will receive a full alphabet set, a candy holder and a newsletter that showcases these designs. These designs are offered at the price of only $5.00 a month and available to Embroidery Bee members exclusively for the first month. After that, they will be released to the public at full price.
This link HERE gives a full description of the club and how it works.
To get members started, a free bonus design is available immediately.
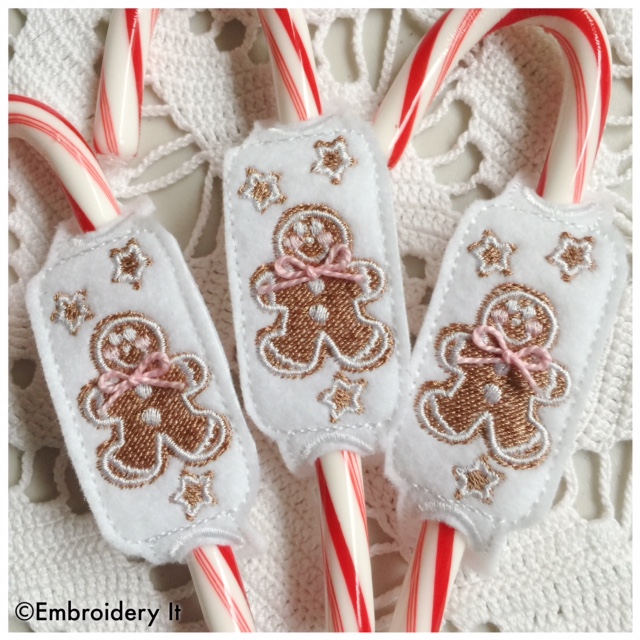
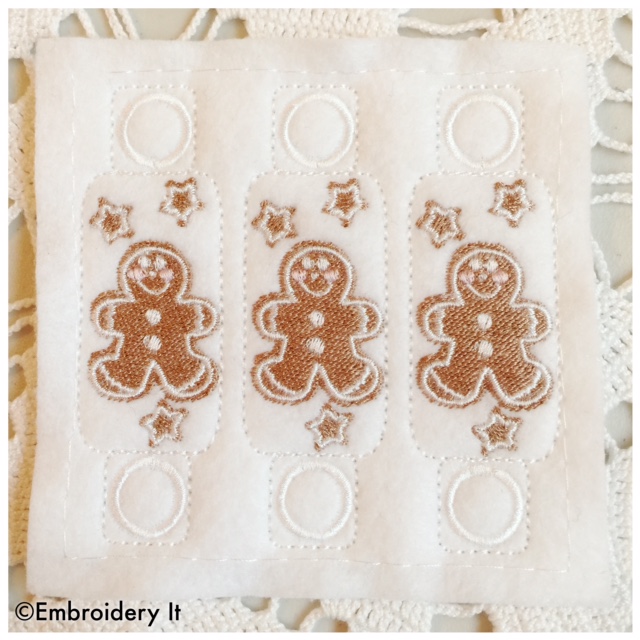
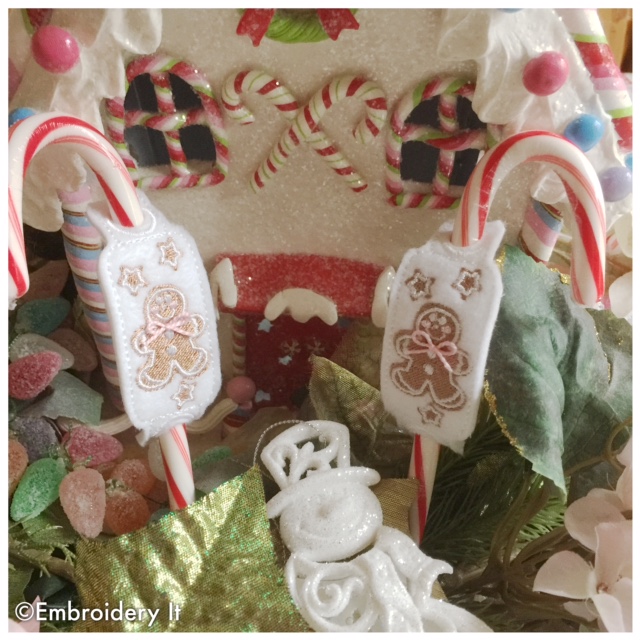
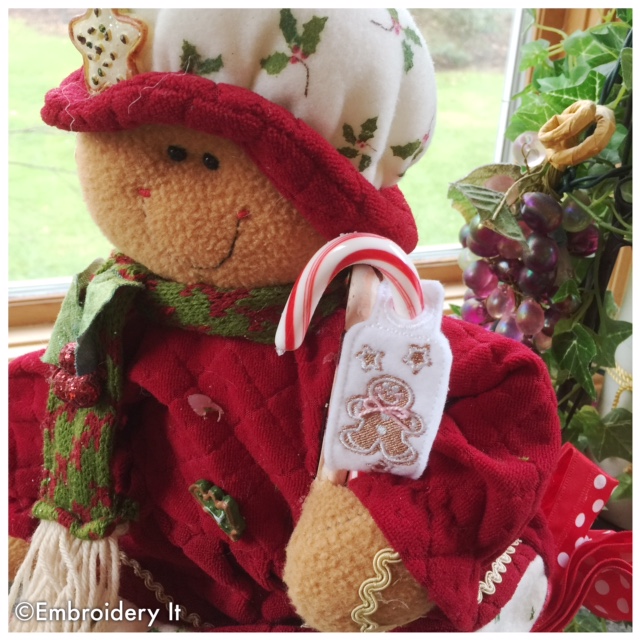
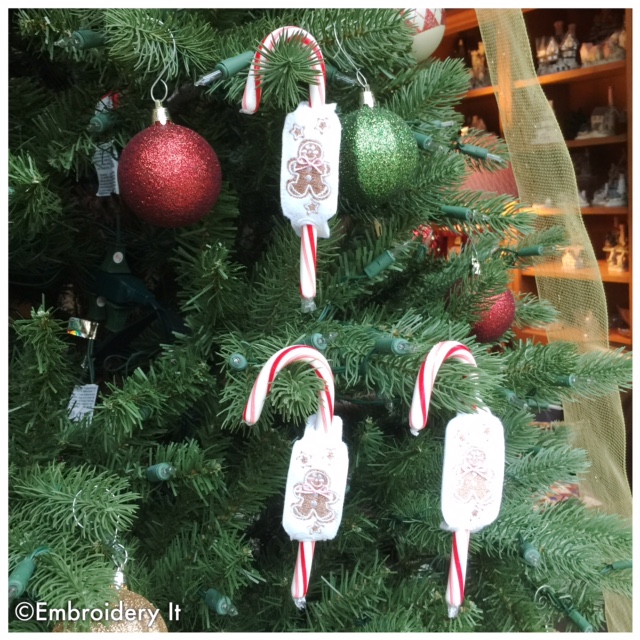
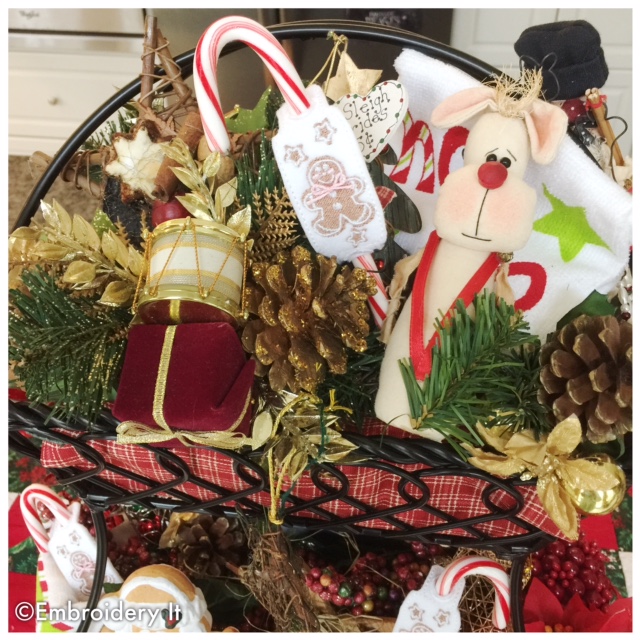
Homemade cookies hot out of Grandma’s oven and piped with icing. That is what these in the hoop candy cane sliders look like. Frosted Christmas Cookies is a fun in the hoop project to make on your embroidery machine using your 4 x 4 hoop. You will take you Christmas decorating and gift giving up a notch. Best part of all, you make 3 in one hooping!
I just want to show off some fun ways to use and display these. I added a bow with pink string, just because I could! 🙂
Frosted Christmas Cookies Candy Cane Sliders can be found here in the Embroidery It Etsy store and in the Zibbet Store.
Have a Happy Sunday!!
Nancy
be creative daily and live life beautifully
PS – If you enjoyed these Candy Cane Sliders, You may enjoy THESE candy cane sliders too!
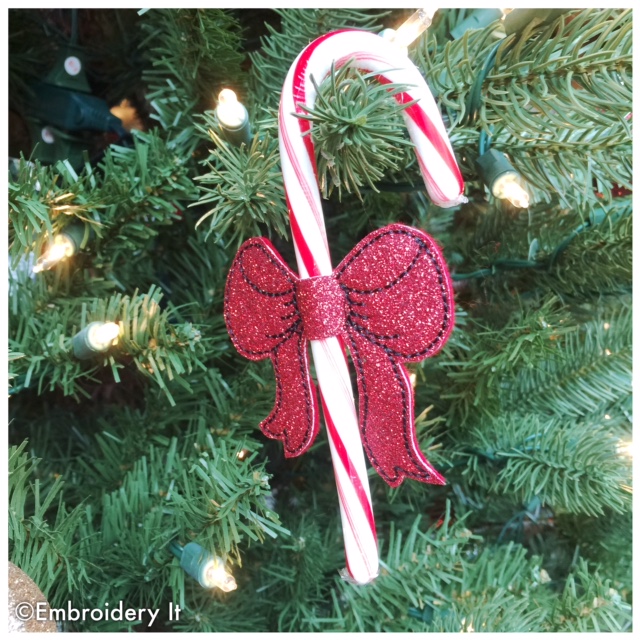
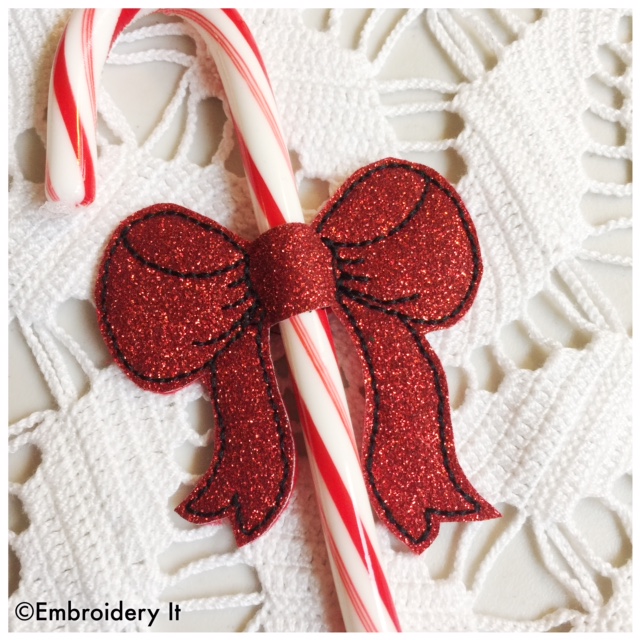
Candy canes just speak Christmas with their beautiful red and white stripes. They are such a fun addition on the tree where children can come and pluck one each day. They adorn packages beautifully and go great with a steaming mug of hot chocolate.
These are a fun in the hoop machine embroidery project. All designs are made in your 4 x 4 hoop.
Here are just a few ways to add just a touch to those candy canes that boost their gift giving presentation.
Ho Ho Ho Candy Cane Sliders are designed to make 3 in one hooping to get your gifts done three times as fast.
The Candy Cane Bow looks beautiful done in felt, or here you see it made with glitter vinyl.
Two candy canes create a lovely heart in this Merry Christmas Sweetheart design.
Have fun with these projects. It is a busy season for sure, but these projects are all quick and easy, stitching up in just a few minutes. They create that added special touch that makes them great for coworkers, classmates, neighbors and more. Add one to your plate of cookies or homemade candy. They are sure to bring a smile.
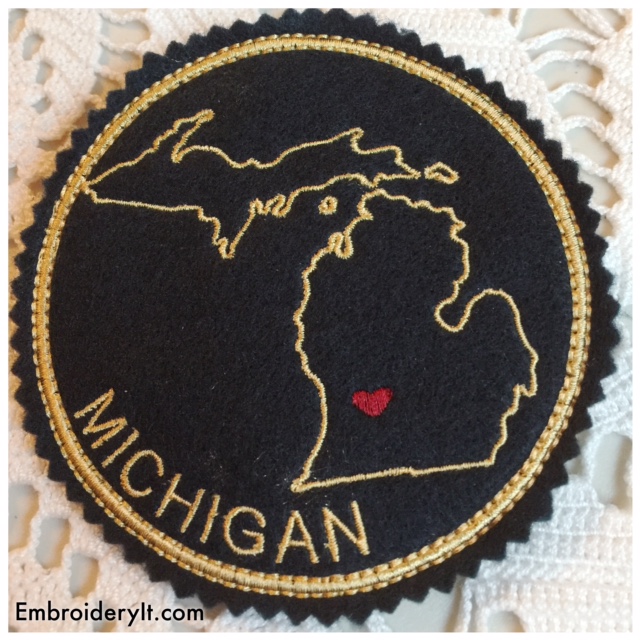
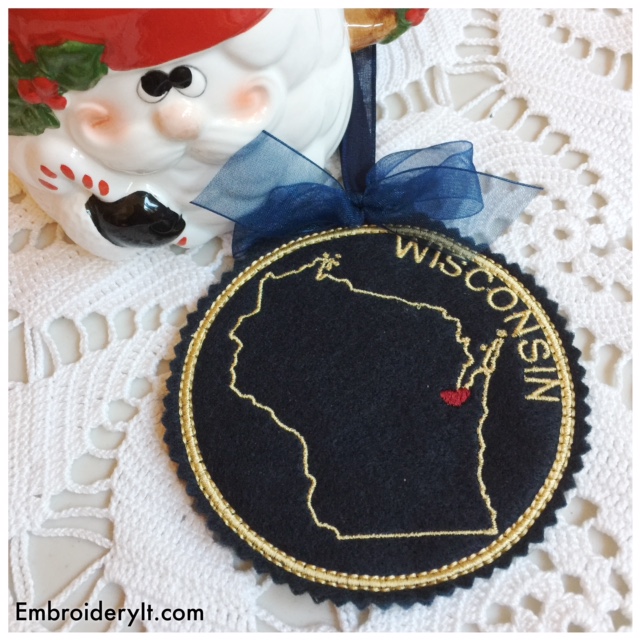
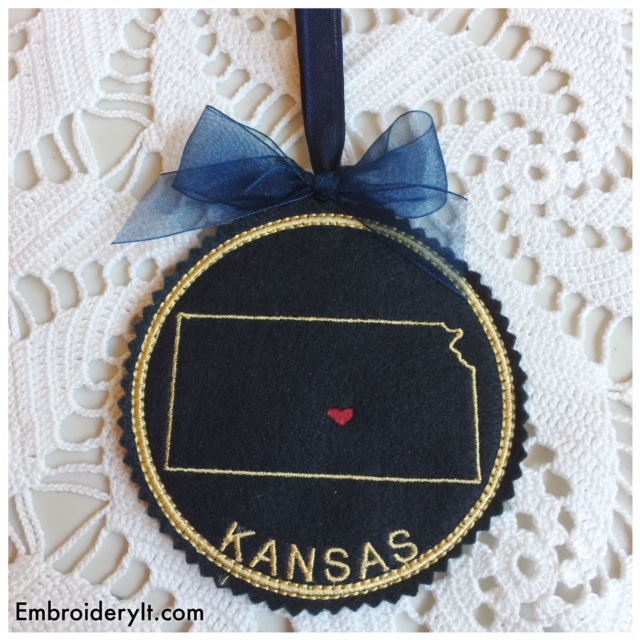
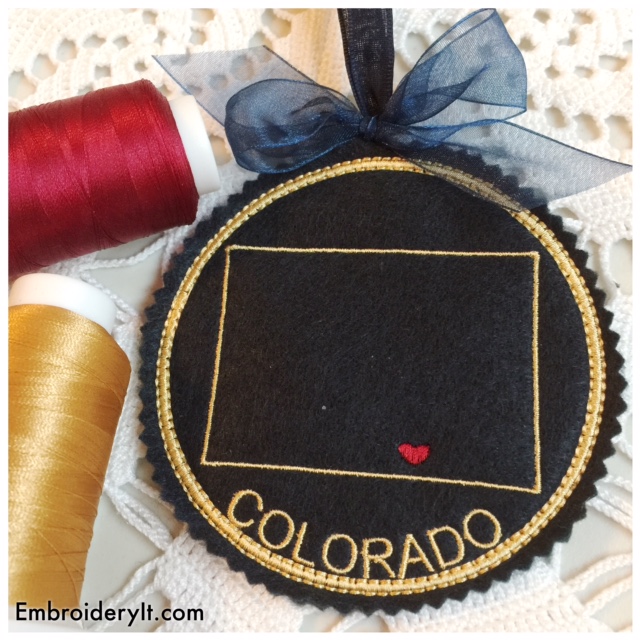
Warm up your embroidery machine and get ready for Christmas and for selling at craft shows by making these state coasters and ornaments.
5 designs currently released and each design can be made into either a coaster or an ornament.
They are stitched on felt using your 4 x 4 hoop. Instructions are given so you can place the heart anywhere in the design using ANY machine. You don’t need special software or machine that positions. It can be done on ANY machine.
Here is a fun in-the-hoop embroidery project for your 5 x 7 machine embroidery hoop.
Make these sweet candy bar wrappers, stitched on felt, to go around a full size Hershey candy bar. Set one at each place setting on your Thanksgiving table, or make a basket full to hand out. Also great for classroom gifts.
They stitch up quickly and easily and instructions are included.
You can find the Thanksgiving Candy Bar Wrappers in the Embroidery It Etsy shop and Zibbet shop.
You all know I’m over at Zibbet these days and I’m excited to share that Zibbet featured the Halloween Lollipop Holders in their Halloween Decoration Ideas blog post.
Zibbet has lots of handcrafted ideas to decorate your home or office as well as for gift giving.
Find the Halloween Lollipop Holder set HERE on Zibbet.
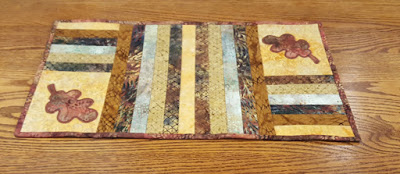
My sweet friend Nancy over at Patchwork Breeze showcased the oak leaf from the Embroidery Jam Fall set in the most stunning table quilt. You can see her work HERE.
Just look at all the beautiful free-motion quilting around the leaf that was done.
Nancy takes you step-by-step through the quilting process on the blog post and even uses her Scan and Cut machine. It really is amazing.
While you visiting Patchwork Breeze, be sure to poke around her blog a bit. She provides a wealth of quilting, sewing and machine embroidery information.
Thank you Nancy for using one of Embroidery It’s designs in your quilt.
You can find the Embroidery JAM Fall Set Here on Etsy and Here on Zibbet.
You know the nurse in me just goes into full on medical mode when people reach out to me for embroidery assistance that meets a medical need they have. Our loved ones who require special feeding needs have a place in my heart. I have always asked God to use this business to be a blessing to others and I’m grateful to be able to offer these feeding pads.
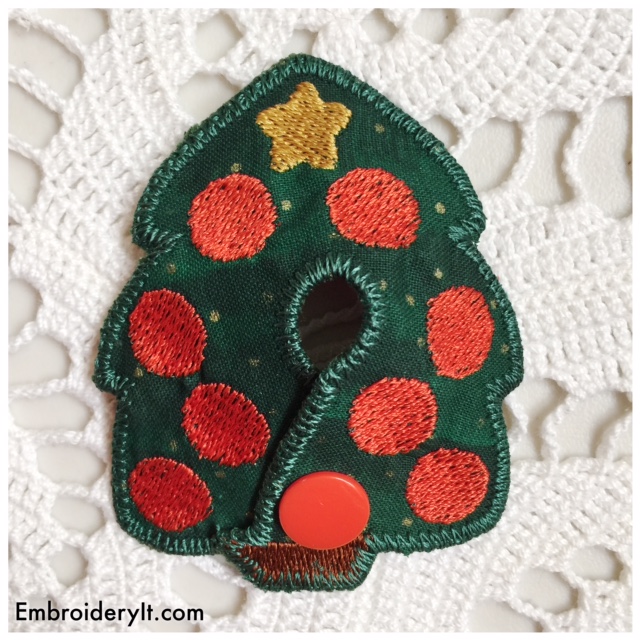
My latest is the Christmas Tree feeding pad. Note that the stitching of the bulbs, star and base of tree are done only on the top and do not go through to the back layer. There is also light stitching done to help prevent any irritation to the feeding tube site.
This design is done in your 4 x 4 hoop and instructions are included.
Here are a few additional tips for making the feeding tube pads.
Use all cotton fabric and absorbent batting. I use cotton flannel as my absorbent batting and for the backing and then a decorative cotton on top.
Wash and dry all the fabrics before embroidering to prevent future shrinking.
Use more than one absorbent layer if necessary.
Use cotton thread to embroider if polyester is irritating.
Use a wash-away stabilizer or clean tear-away stabilizer
Use plastic snaps for comfort rather than velcro
Now you can stitch up a stack of these sweet Christmas trees to get ready for the Christmas season.
You can find the Christmas tree feeding tube pad on Zibbet and on Etsy.
It is a beautiful crisp morning and I’m lovin’ every minute of it. I’m wrapped up in my big fluffy pink robe with my coffee and just enjoying the quiet time before getting ready for church. Just thinking of all I have to be thankful for.
Being real here…Some days being the single owner, one who does it all, of Embroidery It is incredibly rewarding. Always having had the dream of having my own business and then seeing it come to reality is a dream come true. Then there are other parts of the business I just haven’t got a clue with.
Friends, it is time in my business that I look at getting a little help with this website. Not permanent help, but someone to get it going in the direction that aligns with my vision. Someone who I can call upon when I’m baffled with search engine optimization or when I get an error page. Up to this point, I’ve done everything myself.
Friends, it is because of YOU that I am now able to move forward a bit more. I’m just beyond thankful for each and every one of you.
If you read my newsletter you will know that Embroidery It is planning a monthly club in which for a nominal fee you will get brand new, fresh and fun designs. This will begin January 2017. Stay tuned for more information.
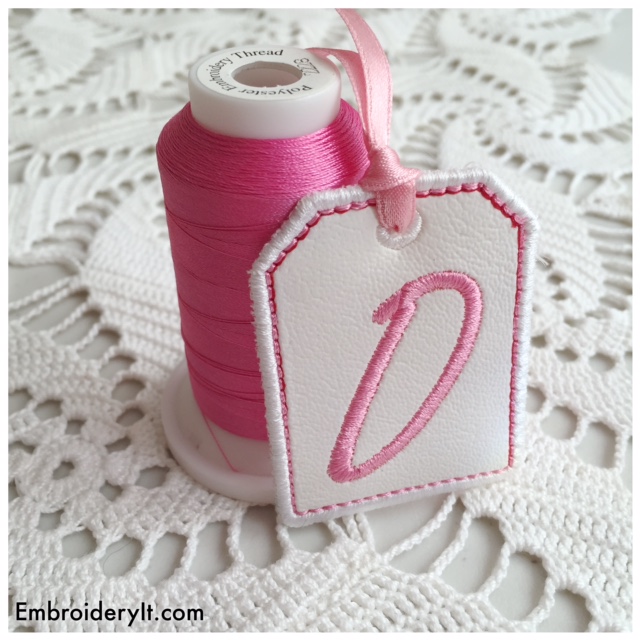
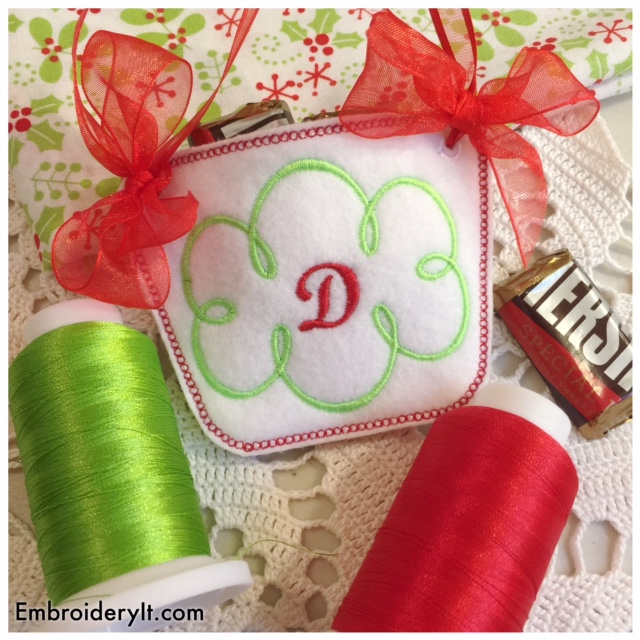
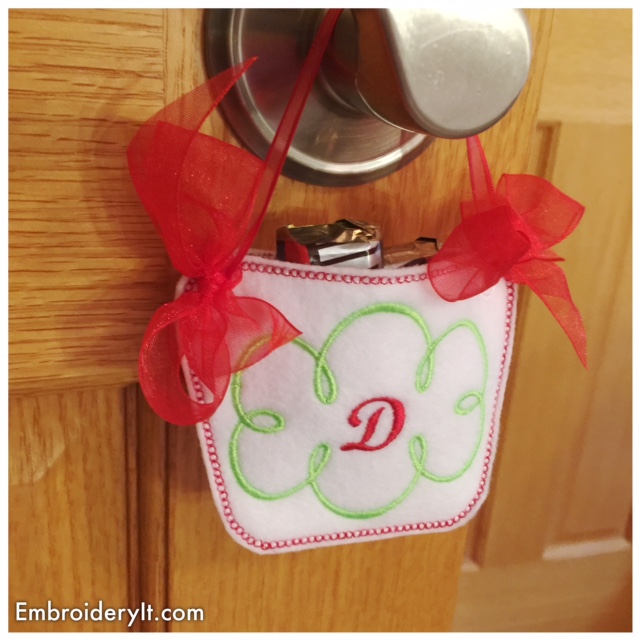
Please be sure to grab the tag letter D. It will be replaced on Wednesday with the letter E so you have a few days yet to get it. Offering a free design each week is my way of saying “Thank You for being a part of my journey and for your support.” I’m so grateful for each of you. Just be sure to scroll down to the bottom of the home page to grab the free design of the week.
It is a cool drizzly morning here in Michigan. Enjoying being snuggled up under the quilt with my computer and cup of coffee.
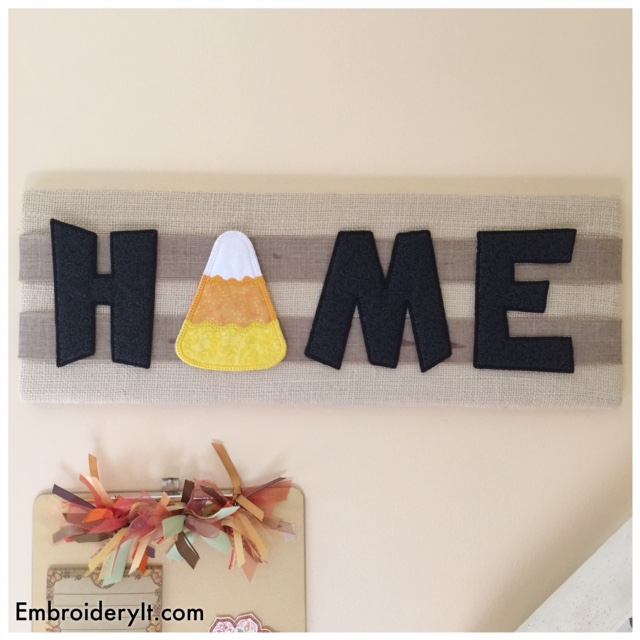
Did you see in the newsletter the Embroidery JAM Candy Corn set was released?
It is a fun addition to the Embroidery JAM family of items and because it is part of the system, it is interchangeable with all other parts.
I made a couple of signs to hang up where there is one letter that can be changed out.
Because I wanted them a certain size, I just got 1/2″ foam board and cut it to the size I wanted.
Then I covered it with burlap, just because I like burlap. The burlap is stapled to the back side with a regular stapler that opens up.
The ribbons and lace are added only for decoration.
A small piece of the hook and loop tape is placed on the back of the designs and on the picture to make them interchangeable.
Then the 3M Velcro adhesives are added to both the back of the foam board and to the wall to hang them up. Just use the small size because these are really light weight.
Find the Embroidery JAM Candy Corn Set HERE on Zibbet and HERE on Etsy.
Just in case you are not subscribed to the newsletter (you should be) I want to let you know we are up to the letter J at the intro price of only .99.
This is a fun and easy in-the-hoop project made in your 4 x 4 hoop.
With a sweet design added on the back side, this design takes only 2 hoopings. Step-by-step instructions included.
I’m showing it here in red and green for Christmas, but just think. You could do orange and brown for Halloween or pastels for Easter, or bright colors for a birthday party.
You can find the letter J here on Zibbet or here on Etsy.
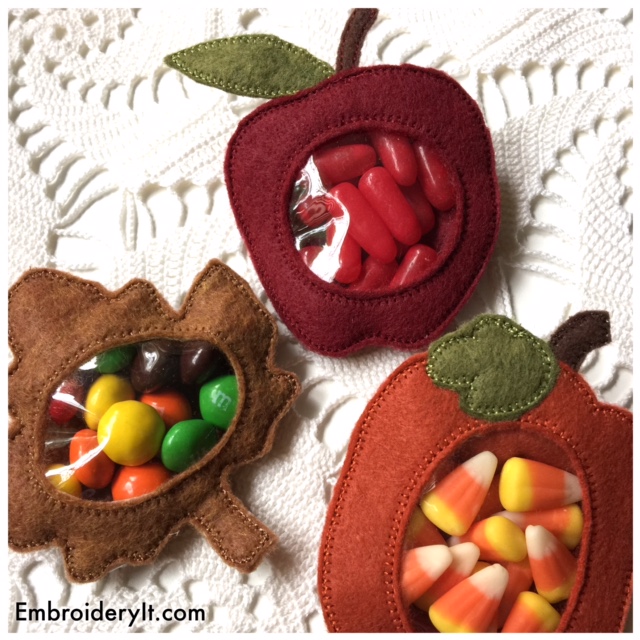
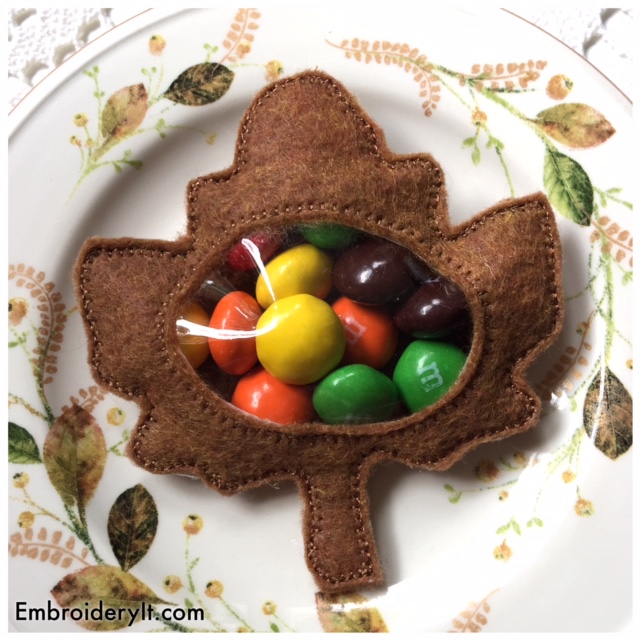
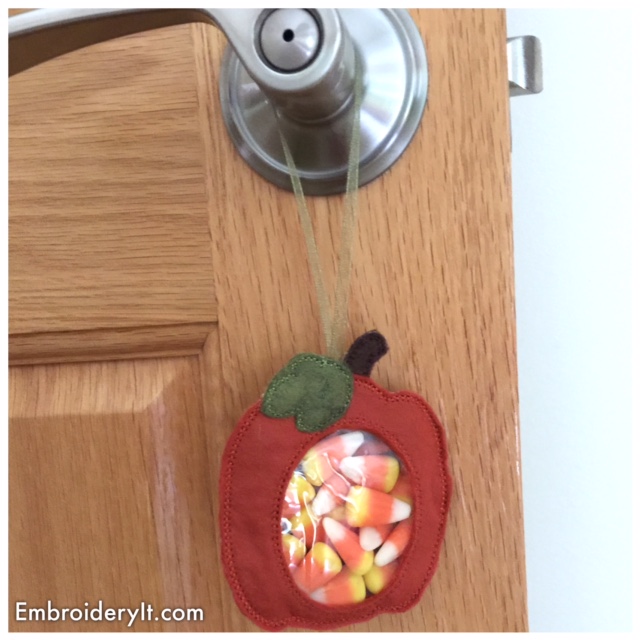
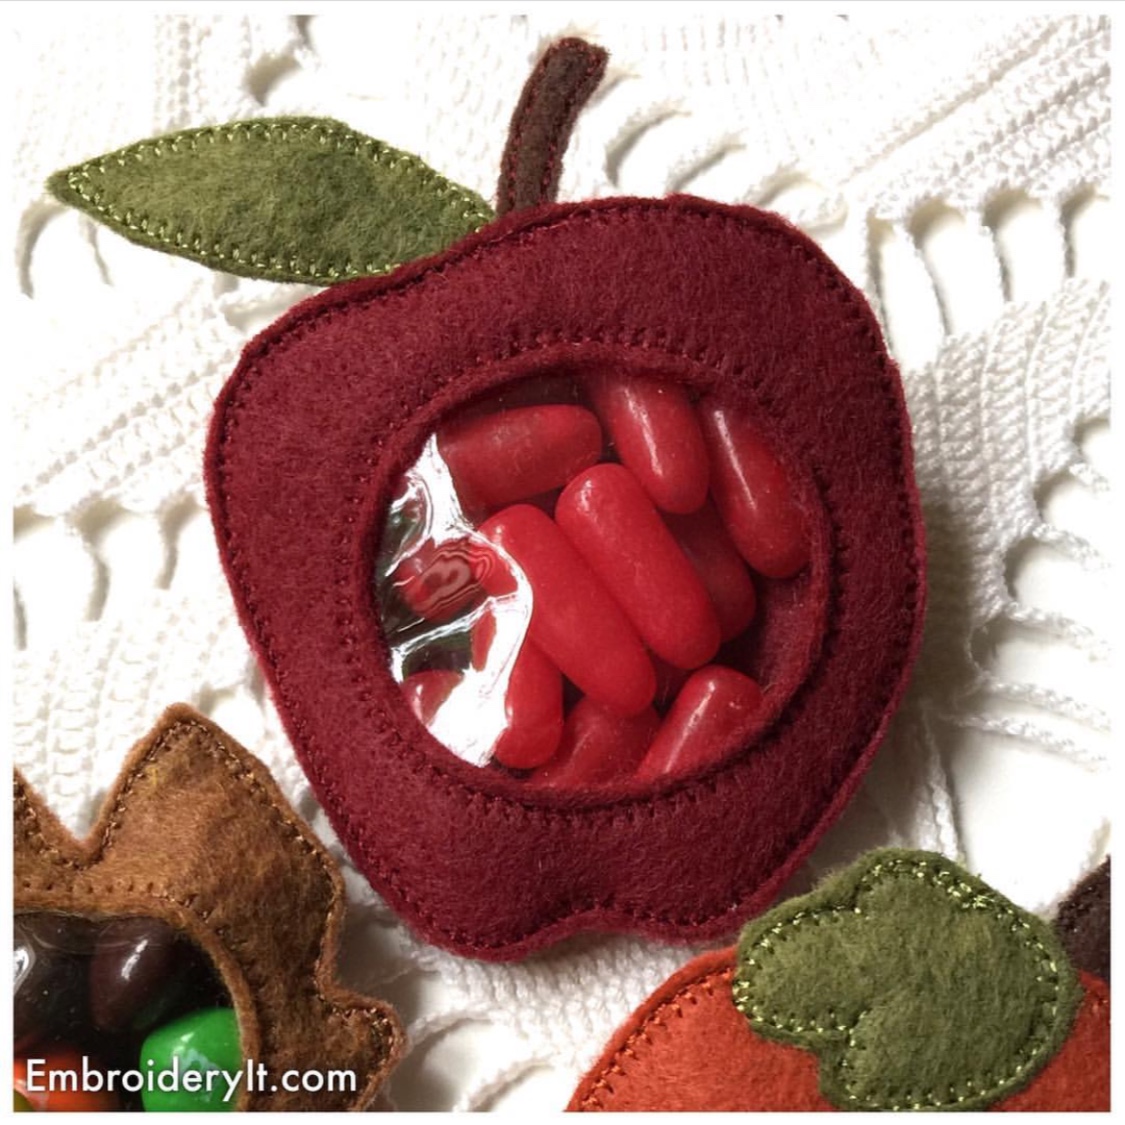
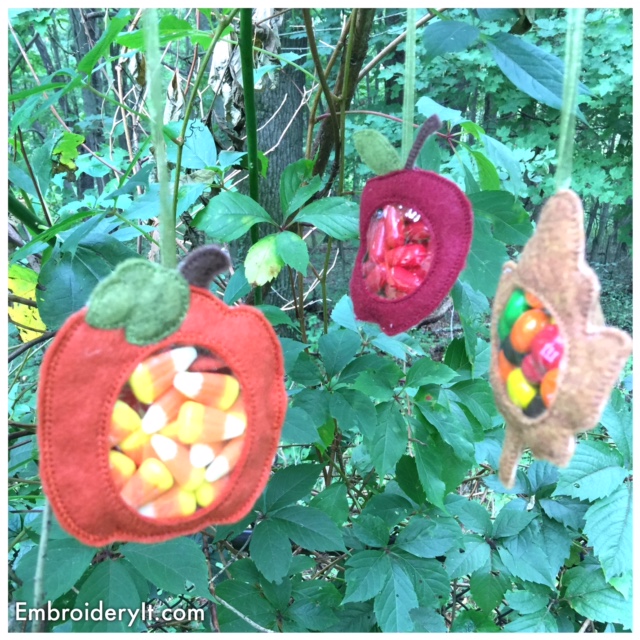
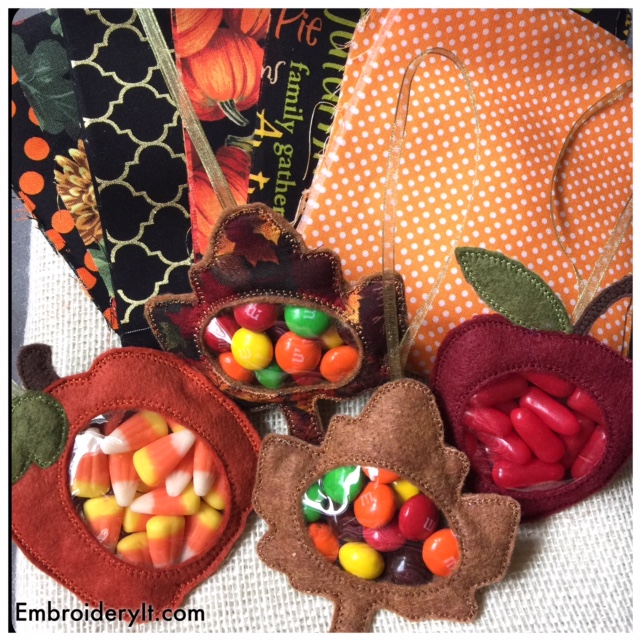
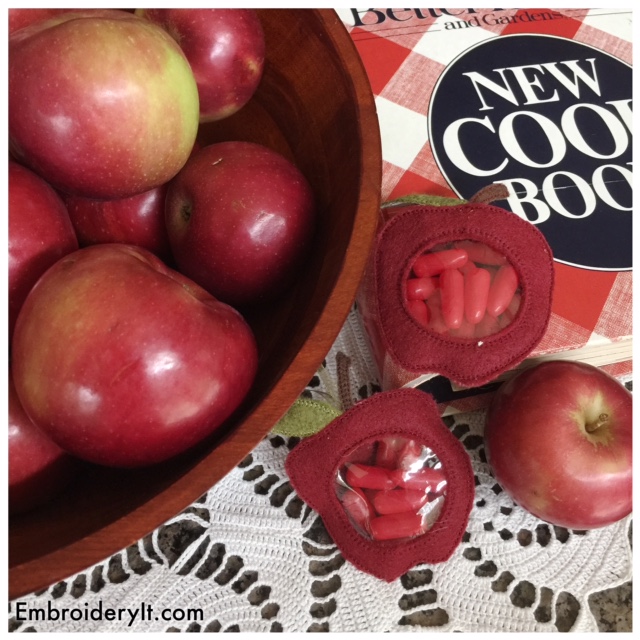
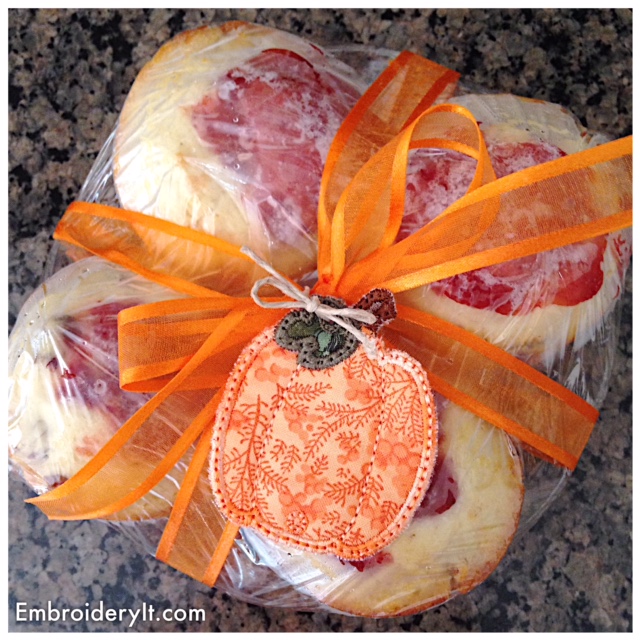
For you Saturday stitching pleasure I want to show off the Fall Candy Holder set made in your 4 x 4 machine embroidery hoop. Candy holders make super quick and easy gifts and are a great way to add simple decorative touches to your home.
Three designs included: Maple leaf, Apple and Pumpkin.
These are stitched with felt and clear vinyl is used for the window. You can also use glitter fabric or vinyl or other non-fraying fabric. Step-by-step instructions with lots of photos included.
Fall candy Holder set can be found here on Etsy and here on Zibbet.
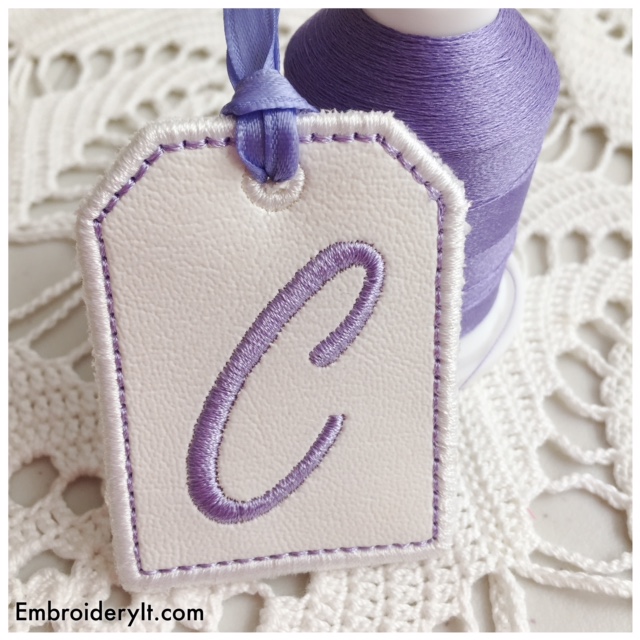
I hope you are having a very creative day today. Just a reminder to be sure and grab the free letter C from the website this week only. Just scroll down to the bottom of the home page.
There is nothing better than to spend time crafting and what fun to mix other things with machine embroidery!
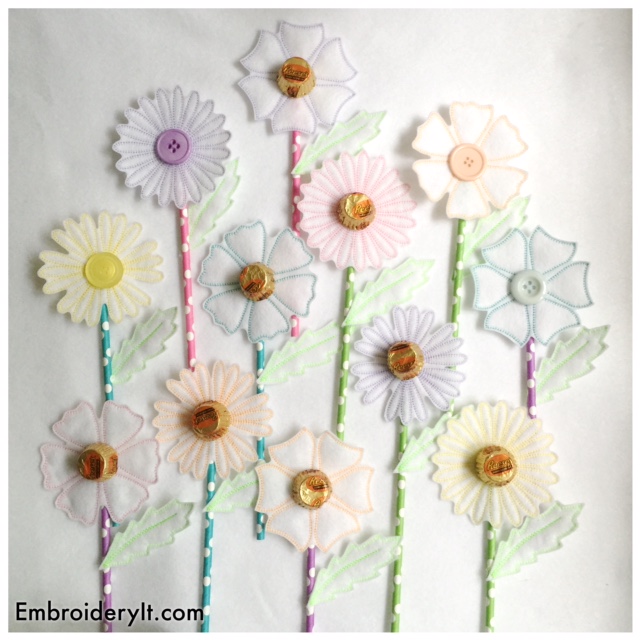
Remember these little cuties?
Well, I took two of the flower designs that remind me of mums and did them up again. (There are 4 different flowers and one set of leaves in the set)
For the centers though, I didn’t want to use candy. (although I made one from candy) I started looking through my button stash and couldn’t find any large dark buttons. For me to drive into Grand Rapids is about a 30 minute trip one way. It was time to shop from what I had at home.
I came across a small bag of flat clear glass pebbles that are just over 1″ in diameter. They came from the floral department at either Hobby Lobby or Walmart. I don’t remember any longer. Since you could see right through them and I wanted the flowers to have a dark center I started looking through some scrapbboking paper. I used to be an avid scrapbooker.
I found a dark small print and using clear glue, glued the paper to the bottom of the pebbles and then trimmed around them.
The flowers were embroidered onto fall colored felt. I used dark brown thread on all the flowers and dark green for the leaves. Then the pebbles were glued to the center of the flowers. The flowers were glued onto bamboo sticks and the leaves glued on the sticks as well.
I love how these turned out and how just changing the felt gave them a whole new look. An entire bouquet of machine embroidery flowers were made in about an hour!
Another fun idea would be to glue them onto pens and give them as a gift with a cute notepad!
If you are interested in the flowers, you can find them on Etsy and on Zibbet.
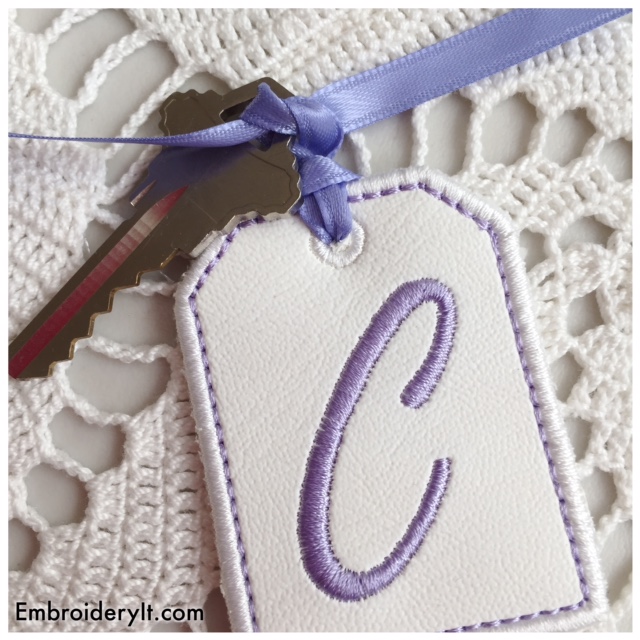
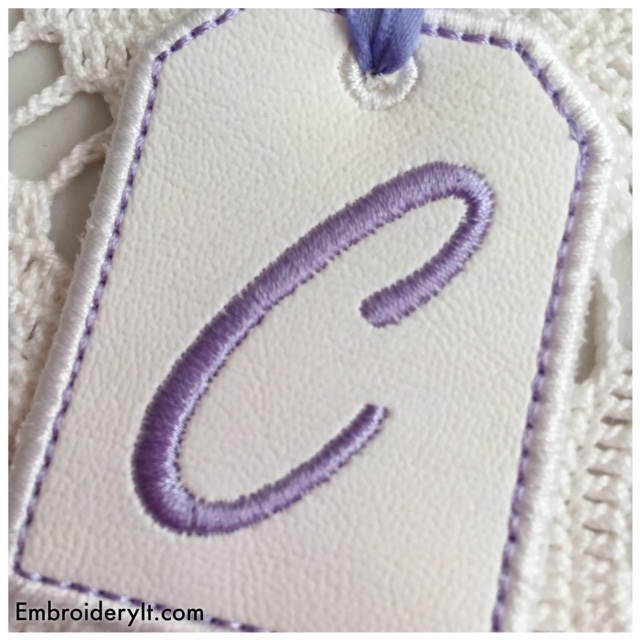
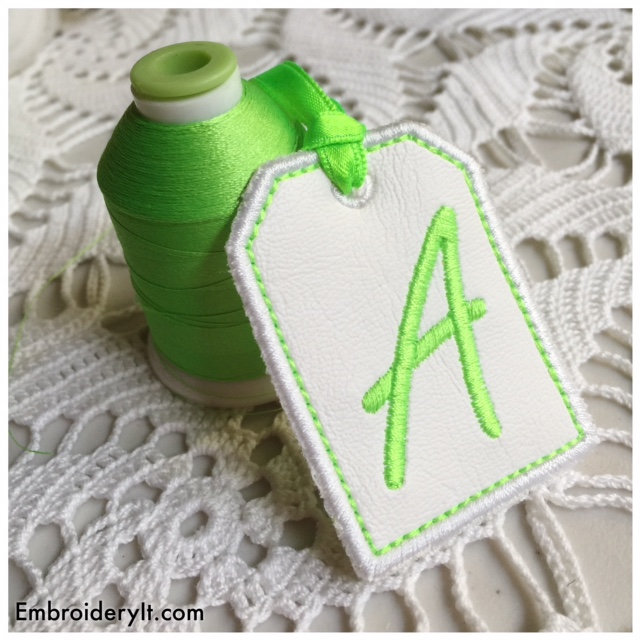
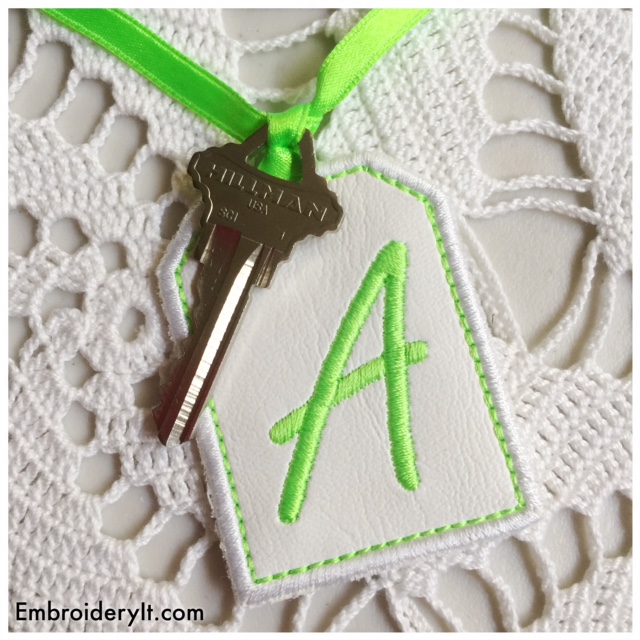
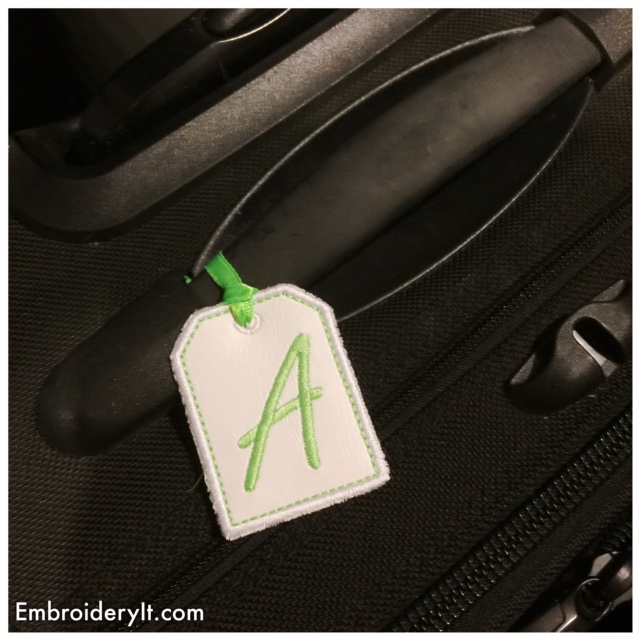
The letter A in the new Tag Alphabet Set begins. This is a fun in-the-hoop project to make on your embroidery machine using your 4 x 4 hoop. Step-by-step instructions included.
Super Easy in-the-hoop design
Just hoop a piece of tear-away stabilizer and off you go. Two pieces, 3″ x 3″, of vinyl are required for this machine embroidery design.
To get the free embroidery design, just scroll to the bottom of the home page to instantly download.
Each letter will be released for free for one week and then will be available for purchase in the Embroidery It Etsy Store.
It’s Fall! I love fall with the only exception that it means winter is on it’s way. (winter being my least favorite season)
The leaves on the trees are just ever so slightly changing right now and I’ve spent the last couple of days getting out the fall decor to cozy up the house a bit.
It seems that everyone is crazy about all things pumpkin. Starbucks has their pumpkin spice latte. I even saw some pumpkin scented lotion and soap at the store the other day.
There are two sizes. One is 5″ and will fit in your 5 x 7 hoop and the other is 8″ for those of you who have the bigger hoops.
I stitched it out on hardanger cloth and put it in an embroidery hoop. Then I found a scrap of black gingham ribbon and made a bow. I topped the bow with a button strung with baker’s twine and also tied it in a bow. I’m lovin’ how it says fall!
School has started and cooler temperatures are happening here in Michigan.
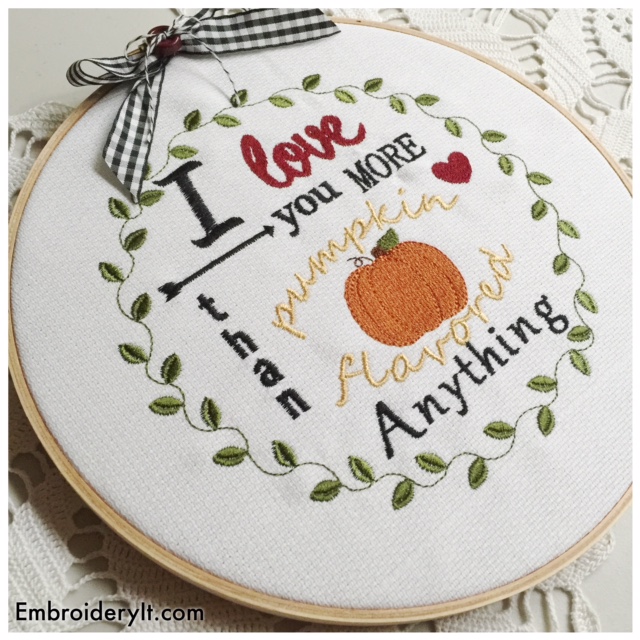
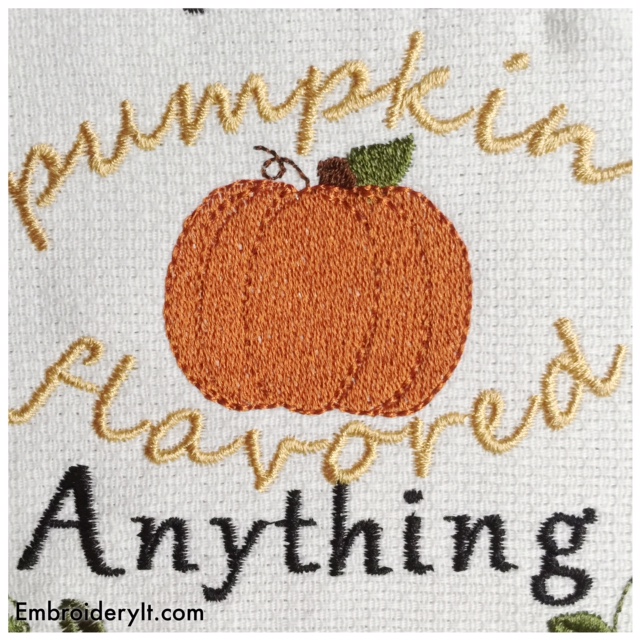
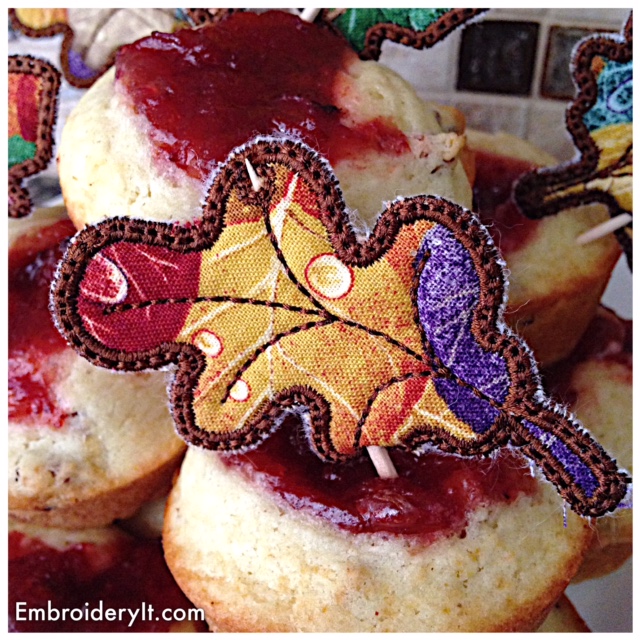
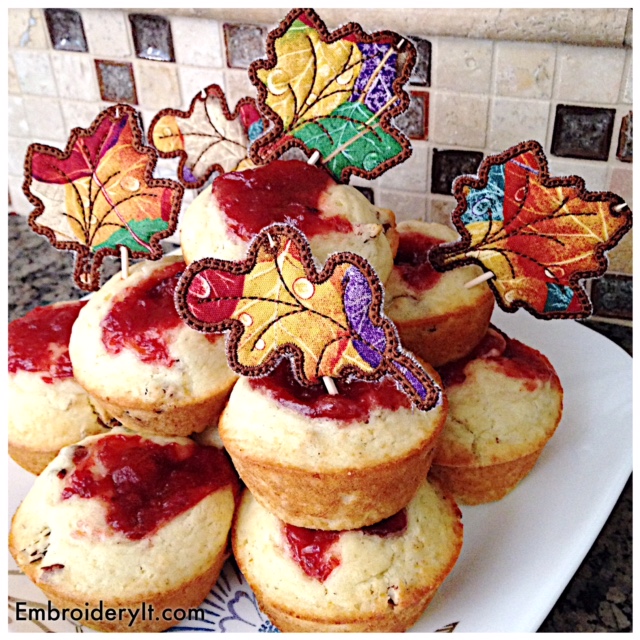
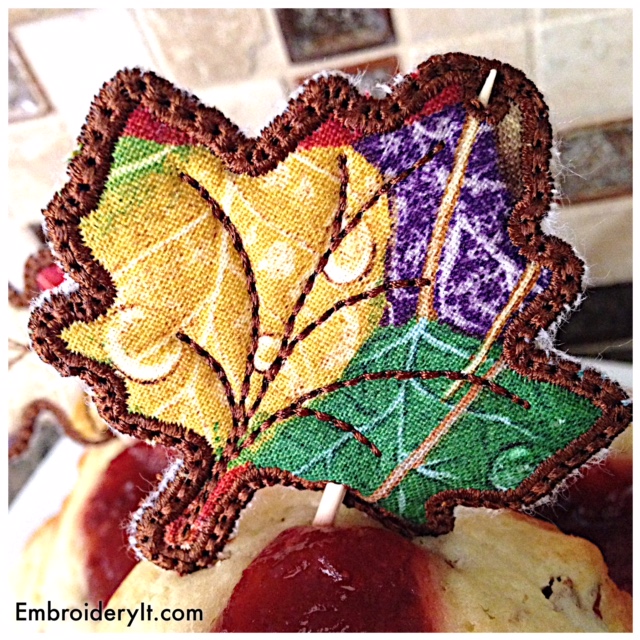
I feel the need to spend time in the kitchen whipping up comfort foods. The Embroidery JAM Fall set makes a perfect muffin topper when making the small size. To learn more about Embroidery JAM, you can read this post here, but basically it is a mix and match of designs as you please.
I want to share with you my recipe for these jelly muffins that are a hit at our home and so pretty to give to a neighbor. A pretty embroidered fall muffin topper makes them a quick sale at church and school bake sales!
Jelly Muffins
1 3/4 cup all-purpose flour
1/4 cup sugar
2 teaspoons baking powder
1/2 teaspoon salt
1 egg beaten
3/4 cup milk
1/3 cup cooking oil
jelly
In a large mixing bowl, stir together the dry ingredients. In a small bowl combine the wet ingredients except for the jelly.
Add the wet ingredients to the dry ingredients all at once and stir until just moistened. Better should be lumpy.
Grease muffin cups or line with paper cups and fill 2/3 full
Spoon 1 teaspoon jelly atop batter in each muffin cup.
Bake in a 400 degree oven for 20 to 25 minutes or till golden.