Why Our Embroidery Machine Prefers Certain Threads

Why Our Embroidery Machine Prefers Certain Threads

Dear Friends,

Have you heard someone say my embroidery machine likes only certain brands of thread?

Today in the Embroidery It newsletter I wrote about why you’ve heard people say this.  You know our embroidery machines are just that.  Machines.  Machines don’t have feelings or preferences but why do some threads work better in our embroidery machines than others?

Why our embroidery machine prefers certain threads

The reason may be due to how the thread is wound or the ‘twist’ that it has.  Some threads come off the spool to the right and some to the left.  That little difference in ‘twist’ might be the reason some machines tend to give us fits with certain threads while other threads give us beautiful results making us say, our embroidery machines truly do have a thread preference.

Friends, I want to let you know that at the bottom of each newsletter is a new section called, “Have You Heard?”  It will contain just a few sentences of a sewing/embroidery tip or trick, a new tool, or event that you might find of value.  I won’t be writing them all here at the blog unless it is something more lengthy.

So be sure to sign up for the newsletter to get valuable embroidery information delivered to your inbox each week.

Embroidery Bee Machine Embroidery Monthly Club

One more bit of valuable information….Have you heard of all the fun happening over in the Embroidery Bee monthly club?  Just click HERE to find out more and join in.  At only $5.00 a month you will receive an alphabet set, candy holder and monthly newsletter with inspiring embroidery ideas.

Make it a great day everyone!

Nancy

be creative daily and live life beautifully

Tip for Perfect Embroidery Design Placement

Tip for Perfect Embroidery Design Placement

Dear Friends,

I have a short 6 minute video that shows you my secret sauce for perfect embroidery design placement on a t-shirt or other item.  It is a small inexpensive item that works like a charm.

You can watch the video right here and if you would like more Embroidery It videos, be sure to visit my YouTube channel.

Enjoy!

Nancy

be creative daily and live life beautifully

My Little Secret to Prevent Puckering while Machine Embroidering


Dear Friends,

Do you still have the little puckers in your embroidery even after you feel you have done everything right?  I have a three and a half minute video in which I share my “secret” to help prevent puckers while doing machine embroidery.

Enjoy!

Nancy

be creative daily and live life beautifully

Tips for Buying Your First Embroidery Machine


Friends,

An embroidery machine is an investment and I want you to get a machine that will bring you many happy hours of embroidery time.

In today’s YouTube video I give you a number of things to think about when you are deciding purchasing your first embroidery machine.

Embroidery Blessings,

Nancy

be creative daily and live life beautifully

Tip Technique Tuesday – A Handy Way to Mark the Center of your Machine Embroidery Hoop

Embroidery It Center of the Hoop Marker

Dear Friends,

Sometimes you just don’t want to mark on your fabric to show where the center of the design is to go.  There could be different reasons such as the type of fabric.  You might not want to mark on velvet, satin, or organza for instance.

When this is the case, a handy way to mark the center is to use a ring reinforcer found in any store that sells office or school supplies.  You can see exactly where you want the center of your design placed.  The back of the ring reinforcer is adhesive and is easily removed from the fabric.

Be creative daily and live life beautifully,

Nancy

Machine Embroidery Quick Tip – Bobbin Thread

Machine Embroidery Quick Tip – Bobbin Thread

Hi Friends,
Machine Embroidery Quick Tip Today!

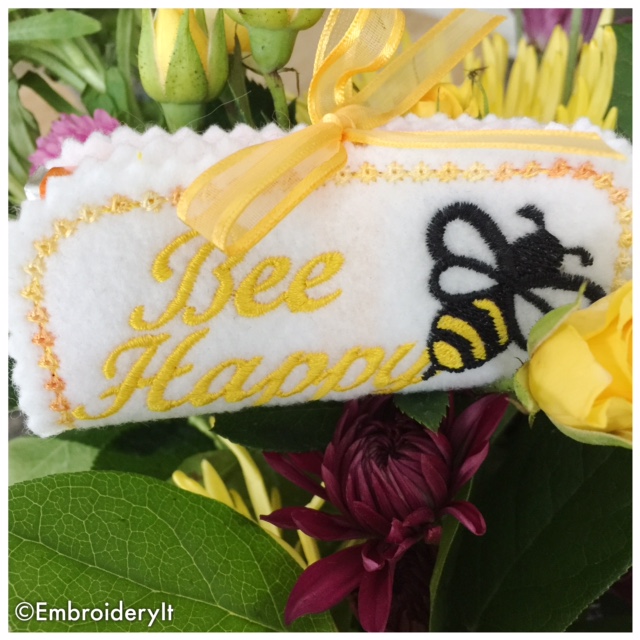
Just take a look at how dense this design is.  It has 71,000 stitches.  Lots of stitches can really create some beautiful designs, but that means the design will be heavy.

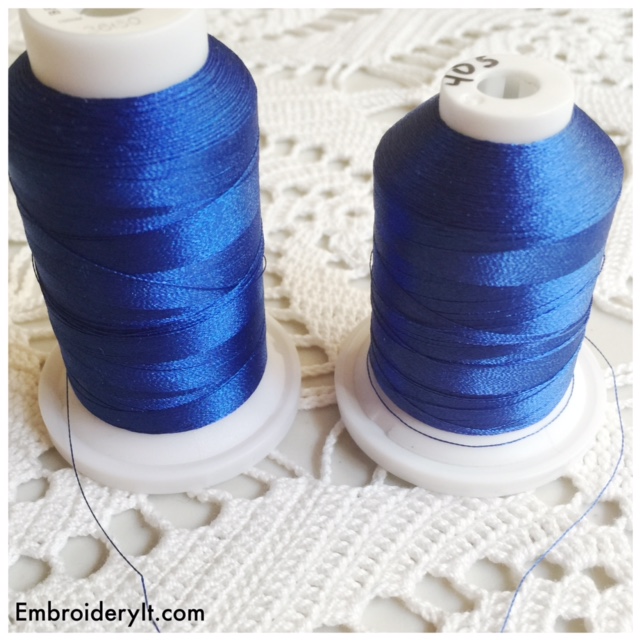
There are times when using a matching color of thread for both the top and bottom is necessary such as when doing free standing lace or when the finished product can be viewed from the back side as well as the front.

But when doing a dense design such as this one, it is best to use a thread specifically made for bobbins, be it pre-wound or that you wind yourself.

Bobbin thread is finer and depending on the brand of both top and bottom thread you are using, you can decrease the denseness or heaviness of your design by up to 1/3.  This means on a design such as the one above you have less chance of issues when creating your project such as less chance of the thread creating a nest, less chance of needle bending and of course the most common and frustrating issue of thread breaking.  Did you know that?  Have you ever heard your embroidery machine going POP – POP – POP as the comes back up from out of the design and it slightly lifts your hoop.  Ok, some of that can be due to digitizing and too many stitches in the same place.  By using a lighter weight bobbin thread you can help prevent some of that from occurring.

I hope you found this helpful today.  The embroidery design comes from Embroidery Library and the bobbin thread is from BFC-Stash.

Happy Embroidering and Blessings to you today!
Nancy

Machine Embroidery Using a Wing Needle

Machine Embroidery using a Wing Needle

Hi Friends,
This past week was spring break for my children and boy did we have fun.  Mike and Tim went on a boy scout camping trip and Emily and I drove to Oklahoma City to visit Katie in the Air Force.

Two beautiful sisters, Emily and Katie.  Oh how mama loves you both!

This was my first time to visit her there!  She gave us a tour of the base and her dorm room (tiny dorm room).  She has her own bedroom with sink, but shares a bathroom and kitchen with another girl.  In her kitchen I saw she had one of my tea towels.  (I was wondering where it had gone to!)  Of course she can have it.  I’m delighted she liked something I had made and wants to use it!  Here it is…

It is just a tea towel with a fabric strip sewn onto the bottom to add more color.  Then for the butterfly, I used colors to match the fabric.  The interesting part of this design is that between the butterfly and the diamond, a wing needle was used with white thread to add a beautiful dramatic effect.

Just look how wide the needle is.  As the needle punches through the fabric, it pushes the fabric and creates a little hole.  Can you see it in the picture above?  It gives is a richness with the texture it creates.  The hole is created by the needle going through the same spot numerous times.  One thing is that you do need to do is manually turn the handwheel of your machine to make certain the needle passes through the throat plate easily.

Just a note, if using a wing needle, be sure to do it on a cotton fabric.  If you use it on a fabric with polyester or other man made material, the fabric will have a tendency to spring back into place and the little hole will fill in and not be noticeable.
Also it is wise to use an embroidery design especially made for using a wing sewing needle.  This design is from Sew Inspired by Bonnie.
So we are back home now.  This morning we are home and the sun is shining.  The leaves on the trees are the most beautiful spring green and the robins, finches and other birds are singing.  Spring always has been and always will be my favorite season.
Love and blessings to you all!

Nancy

Machine Embroidery – St. Patrick’s Day Applique Shamrock and More!

Machine Embroidery – St. Patrick’s Day Applique Shamrock and More!

Hi Friends,
I’m having a little St. Patrick’s Day fun in doing this machine embroidery applique shamrock.  All designs from Needle Little Embroidery.  I did this on a tote bag from the Dollar Tree!  The applique fabric is glitter fabric from Hobby Lobby.  It comes in cuts 8 1/2″ x 11 1/2″ and is found by the cut felt.  $1.47 for the piece minus my 40% coupon.  It is a cotton fabric that has glitter bonded to the surface of it and it embroiders quite nicely.  I think it would be perfect material for an applique Christmas tree or tags on Christmas presents.  With its shine it would make some great Christmas ornaments, or how about Easter tree ornaments made with pastel glittered sheets.  I’m really thinking I will go back and pick up some more of this fun fabric in other colors!

Next it was onto making two St. Patrick’s day coasters.  You will never guess what these are stitched on……
Here it is!  Grip Prints rubberized shelf liner from Contact.  I got this at Target.  It stitched beautifully on it.

The final simple secret…Adhesive backed cork board, found in the scrapbook section of your craft store.  This makes a perfect coaster.  Note:  I stitched the blanket stitch around the designs when they were finished.

Happy Embroidering,
Nancy

Machine Embroidery – Dealing with Pull Compensation

Machine Embriodery – Pull Compensation

Dear Friends,
I have finished Lesson One of Generations Digitizing Machine Embroidery Workshop.  Let me tell you, Wow do I ever have a lot to learn!  I went through the workshop 3 times!  From time to time, I’d like to share bits and pieces with you of what I learned.  I hope you find this as interesting as I do.
The star sugar cookie you see here is the homework project for this lesson.  It was a less than perfect design to begin with.  Is there such a thing as a perfect design?  Anyway, we were given specific instructions on how to make improvement to the design and it covered quite a number of topics but what I want to speak specifically about is pull compensation.
As a design is stitched, and as the needle pierces the fabric thousands of times, that piercing of fabric causes a stretching or pulling of the fabric.  This is particularly the case with filled designs such as this one.  Take note in the above two pictures.  On the computer screen, the design looked perfect.  It looked as though the dark tan and light tan in the cookie would perfectly meet up with one another.  Not so when the design is stitched out.  I have paid good money for designs in which the pull compensation was not adjusted for and it had gaps such as this. Those were frustrating experiences.
Now, I don’t have experience with other brands of digitizing software and my experience with Generations software is minimal at best, but I am guessing that all forms of software have an ability to adjust for the pull compensation.
Take a look at the picture above where I have made the adjustment and restitched out the design.  It meets up perfectly.  Thankfully I had instructions to help me with this.  I think though that adjusting for the pull compensation is something that comes with good ol’ practice.

See here in this photo just how nicely the dark and light tans meet up.  That is the way it is supposed to look.

Did you understand pull compensation before you learned to digitize?  It was certainly new to me.

Happy stitching,
Blessings~Nancy

Machine Embroidery on Soap? Oh Yes You Can!

Machine Embroidery On Soap? Oh Yes You Can!

This is soap!  It really is!  What a fun, novel gift to give someone.
But how did you do that Nancy?  I’m so glad you asked.  Look closely at the picture below for the secret ingredient.

Tulle!  This fine mesh netting is the perfect medium to stitch the design on.  You can see, it is almost clear!

Start by hooping water soluble stabilizer and tulle together.  Choose a design created with a running stitch.  The butterfly above is from Anita Goodesign.  I used variegated thread.  When the design finishes stitching out, cut closely to the design to cut away most of the tulle and water-soluble stabilizer.  Then rinse out the stabilizer and the design remains on the tulle.  A solid filled design or a design with satin stitching will not work well for this as it will get lost in the holes of the tulle.

Carefully lay the design on the soap.  Wet a washcloth or paper towel and lay on the design.  This will soften the soap.  Lightly press the design into the soap.  Note:  Choose a soap that doesn’t have an embedded print on it.  Many national brand soaps such as Ivory have their name stamped into the soap.  You want a flat soap surface.  This one happens to be a bar of Jergens.  It does have Jergens stamped on the other side of the soap.  I’m using the back side of it to place the embroidery.

 Another note:  The soap is for decorative purposes only.  It is not meant to be used or, of course, the stitching will wash off.

This design comes from Anita Goodesign’s cd A Quilt for All Seasons – Spring
Embroidery blessings to you all,
Nancy

Machine Embroidery on Jeans

Machine Embroidery on Jeans

Hi Friends,
Today I have another one of Michelle’s designs from Needle Little Embroidery.  I had been wanting to put some bling on my jeans so this design seemed just right.
I can’t believe I posted a picture of my backside!
For this design I used silver metallic thread.  Now when stitching on jeans you can stitch directly as I did, or you could remove the pocket and stitch the design on the pocket and re-sew the pocket back to the jeans.  I didn’t mind not having a back pocket so I just stitched it through the pocket and jeans together.
My next question was what type of needle should I use?  A heavy jeans needle, a metallic thread needle, or a heavier embroidery needle?  I knew there were going to be places where the needle would have to penetrate through three layers of denim as well as the stabilizer.  I decided that the heavy fabric trumps thread and stitching so I went with the jeans needle.  I set my machine on the slowest embroidery speed and I used a medium to heavy weight cut-away stabilizer.
I turned my $12 pair of jeans into a $60 pair of jeans!
Be sure to stop over at Needle Little Embroidery http://www.needlelittleembroidery.com/ and this specific design is “Heart of Elegance”.
Blessings and Happy Embroidering!
Nancy